 If you want easy access to your most frequently used programs and files but don’t want to clutter your desktop with shortcuts, you can store shortcuts to programs and folders in a toolbar on your desktop. Follow the tip below to get started
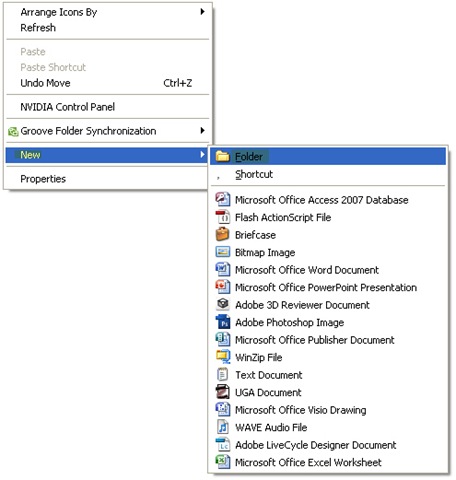
1. Right-click an empty area on the desktop, choose “New” from the drop down menu, and then choose “Folder“. A folder will appear on the desktop. This is the folder you will use as the shortcut toolbar. Click on the image below to enlarge
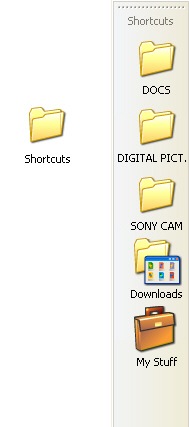
2. Type a name for the folder (for example, Shortcuts), and then press ENTER.

3. Drag the folder to the very left, right, or top edge of the screen, and then release it. The folder will now look like a toolbar. Click on the image below to enlarge

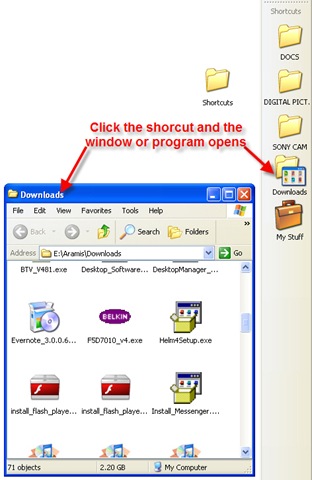
4. Drag the shortcuts to the toolbar that you want to appear there. The shortcuts will appear on the toolbar. Click on the image below to enlarge
5. Click any shortcut on the toolbar to open its associated program or file. When you create a shortcut toolbar, the folder you created it from remains on your desktop. If you do not want to see the folder on your desktop, you can hide it. The toolbar will remain on the desktop, but the folder will disappear. Click on the image below to enlarge
This tip works for both XP or Vista, and it will help you organize all your shortcuts. One thing I wanted to mention is that you can adjust the thickness of the toolbar and change the icons to be viewed small instead of large.